[SwiftUI] ButtonStyle SubClassing을 활용하여 SNS로그인 만들기
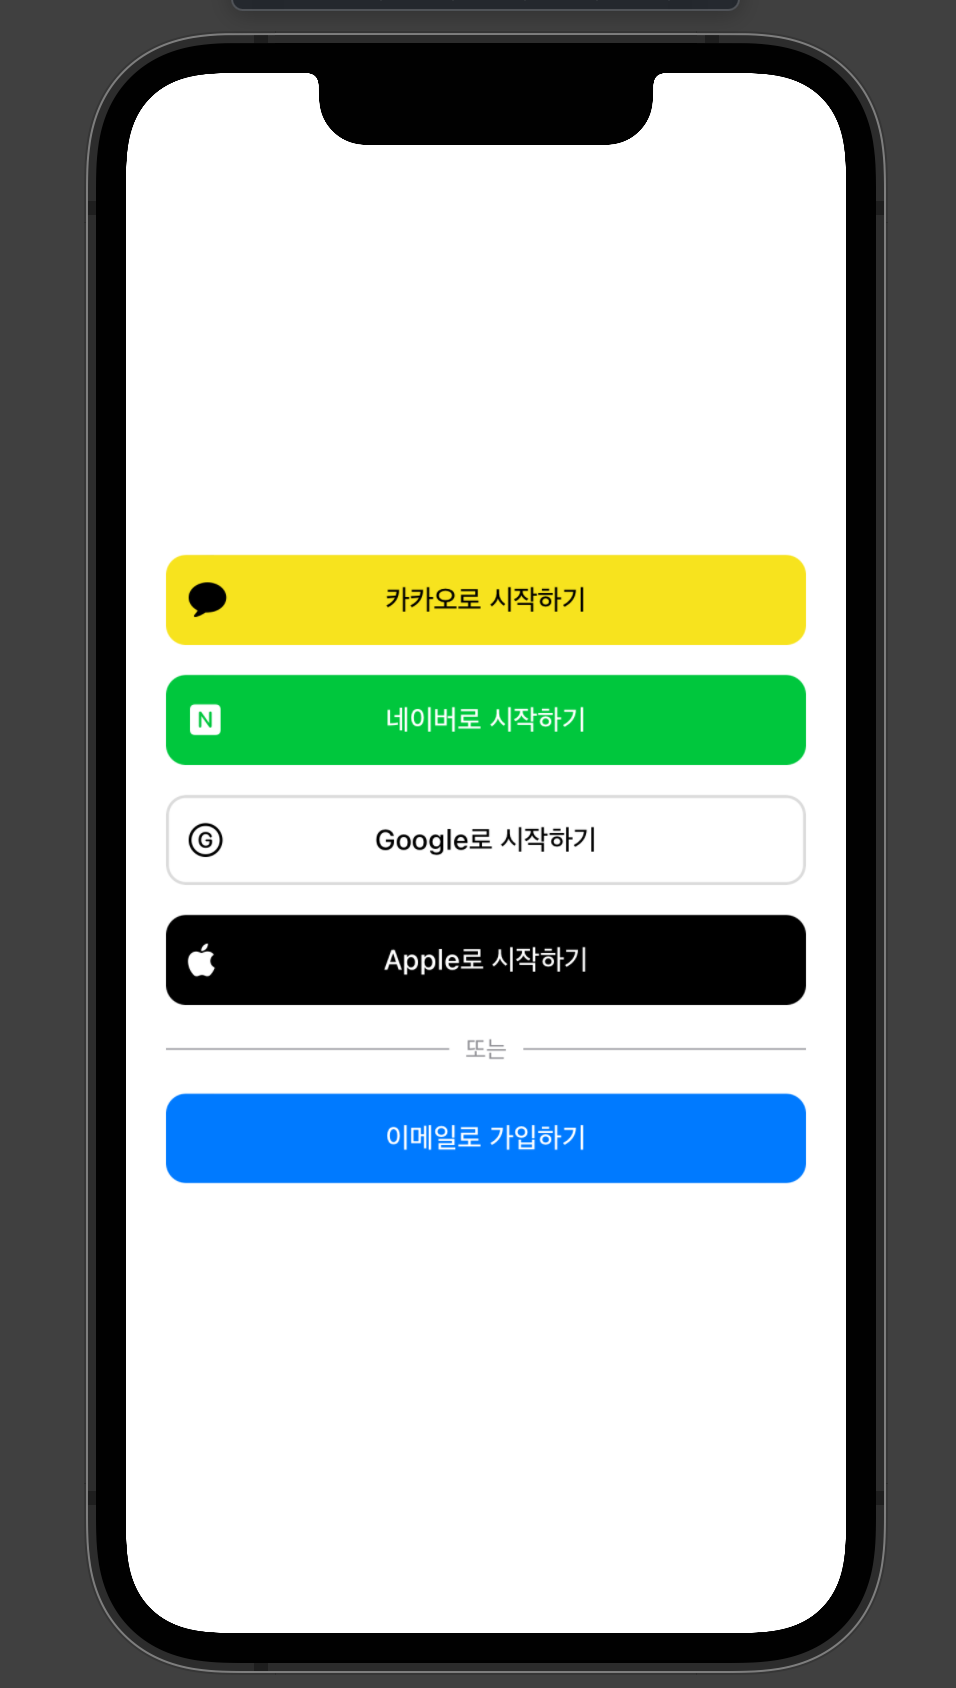
SwiftUI로 진행하는 프로젝트에 위와같이 SNS로그인버튼으로 이뤄진 화면을 만들일이 생겨 코드를 짜봤다 일단 아직 나는 SwiftUI가 익숙하지 않기 때문에 구글링을 하며 하드코딩으로 뷰를 짜봤다
import SwiftUI

struct SignUpView: View {
    var body: some View {
        VStack {
            Spacer()

            VStack(alignment: .center, spacing: 15) {

                Group {
                    Button (action:{ print("카카오")}) {
                        ZStack(alignment: .leading) {
                            Image(systemName: "message.fill")
                                .foregroundColor(.black)
                            HStack(alignment: .center) {
                                Spacer()
                                Text("카카오로 시작하기")
                                    .foregroundColor(.black)
                                    .font(.system(size: 14, weight: .medium, design: .default))
                                Spacer()
                            }
                        }
                    }
                    .padding()
                    .frame(height: 45)
                    .background(.yellow)

                    Button (action:{ print("네이버")}) {
                        ZStack(alignment: .leading) {
                            Image(systemName: "n.square.fill")
                                .foregroundColor(.white)
                            HStack(alignment: .center) {
                                Spacer()
                                Text("네이버로 시작하기")
                                    .foregroundColor(.white)
                                    .font(.system(size: 14, weight: .medium, design: .default))
                                Spacer()
                            }
                        }
                    }
                    .padding()
                    .frame(height: 45)
                    .background(.green)

                    Button (action:{ print("구글")}) {
                        ZStack(alignment: .leading) {
                            Image(systemName: "g.circle")
                                .foregroundColor(.black)
                            HStack(alignment: .center) {
                                Spacer()
                                Text("Google로 시작하기")
                                    .foregroundColor(.black)
                                    .font(.system(size: 14, weight: .medium, design: .default))
                                Spacer()
                            }
                        }
                    }
                    .padding()
                    .frame(height: 45)
                    .background(
                        RoundedRectangle(cornerRadius: 10)
                            .strokeBorder(.gray, lineWidth: 1.5)
                    )

                    Button (action:{ print("애플")}) {
                        ZStack(alignment: .leading) {
                            Image(systemName: "applelogo")
                                .foregroundColor(.white)
                            HStack(alignment: .center) {
                                Spacer()
                                Text("Apple로 시작하기")
                                    .foregroundColor(.white)
                                    .font(.system(size: 14, weight: .medium, design: .default))
                                Spacer()
                            }
                        }
                    }
                    .padding()
                    .frame(height: 45)
                    .background(.black)

                }.cornerRadius(10)

                HStack {
                    LinearGradient(colors: [.gray], startPoint: .leading, endPoint: .trailing)
                        .frame(height: 0.5, alignment: .center)
                    Text("또는")
                        .foregroundColor(Color.gray)
                        .font(.system(size: 12, weight: .regular, design: .default))
                    LinearGradient(colors: [.gray], startPoint: .leading, endPoint: .trailing)
                        .frame(height: 0.5, alignment: .center)
                }


                Button (action:{ print("이메일")}) {
                    HStack(alignment: .center) {
                        Spacer()
                        Text("이메일로 시작하기")
                            .foregroundColor(.white)
                            .font(.system(size: 14, weight: .medium, design: .default))
                        Spacer()
                    }
                }
                .padding()
                .frame(height: 45)
                .background(.blue)
                .cornerRadius(10)
            }

            Spacer()
        }
        .padding(20)
    }
}
action로직을 하나도 작성하지 않았지만 상당히 코드가 지저분하고 길다
그래서 ButtonStyle을 활용해 좀더 나이스한 코드를 짜보려고 한다
우선 로그인 타입을 enum으로 만들어 각 타입별로 쓸 객체들을 변수로 만들어둔다
public enum SignType {
    case kakao
    case naver
    case google
    case apple
    case email

    var textColor: Color {
        switch self {
        case .kakao, .google:
            return .black
        case .naver, .apple, .email:
            return .white
        }
    }

    var backGroundColor: Color {
        switch self {
        case .kakao:
            return .signKakao
        case .naver:
            return .signNaver
        case .google:
            return .white
        case .apple:
            return .black
        case .email:
            return .blue
        }
    }

    var logoImage: Image {
        switch self {
        case .kakao:
            return Image(systemName: "message.fill")
        case .naver:
            return Image(systemName: "n.square.fill")
        case .google:
            return Image(systemName: "g.circle")
        case .apple:
            return Image(systemName: "applelogo") //이미지는 최대한 애플의 SFSymbol중 가장 비슷한 이미지를 활용함
        case .email:
            return Image(systemName:"") // email로 가입은 이미지를 쓰지않음
        }
    }
}
그리고 ViewModifier를 상속받은 ButtonModifier 구조체를 생성한다
(이 Modifier는 추후에 다른 버튼이나 버튼스타일을 서브클래싱할때 재사용이 가능하다)
struct SignUpButtonModifier: ViewModifier {
    var textColor: Color
    func body(content: Content) -> some View {
        HStack {
            Spacer()
            content
                .font(.system(size: 14, weight: .medium))
                .foregroundColor(textColor)
            Spacer()
        }
    }
}
textColor를 파라미터로 받아 버튼의 타이틀칼라를 커스텀하게한다
font나 다른 인자들을 더 받게 만들어 다른 버튼들을 만들때 확장성있는 재사용 Modifier로 만들어 줄 수 있다.
마지막으로 ButtonStyle을 상속받은 SignUpButtonStyle 구조체를 만든다
public struct SignButtonStyle: ButtonStyle {
    var signType: SignType

    public func makeBody(configuration: Configuration) -> some View {
        ZStack(alignment: .leading) {
            configuration.label
                .modifier(SignUpButtonModifier(textColor: signType.textColor))
                .frame(height: 45)
                .background(
                    Group {
                        switch signType {
                        case .google:
                            RoundedRectangle(cornerRadius: 10)
                                .strokeBorder(.gray, lineWidth: 1.5)
                        default:
                            signType.backGroundColor
                        }
                    }
                )
                .cornerRadius(10)

            signType.logoImage
                .foregroundColor(signType.textColor)
                .offset(x: 10)
        }
    }
}
이미지는 맨왼쪽에 offset값을 줘 10포인트 만큼 떨어지게끔 만들어주고
ZStack을 활용해 버튼의 titleLabel은 가운데에 오게끔 만들어준다
이제 SignUpView로 돌아가 지저분한 코드들을 지우고 SubClassing된 ButtonStyle을 활용해 UI를 그려보자
struct SignUpView: View {
    var body: some View {
        VStack {
            Spacer()

            VStack(alignment: .center, spacing: 15) {

                Button("카카오로 시작하기") {}
                .buttonStyle(.signButton(type: .kakao))

                Button("네이버로 시작하기") {}
                .buttonStyle(.signButton(type: .naver))

                Button("Google로 시작하기") {}
                .buttonStyle(.signButton(type: .google))

                Button("Apple로 시작하기") {}
                .buttonStyle(.signButton(type: .apple))

                HStack {
                    Color.gray
                        .frame(height: 0.5, alignment: .center)
                    Text("또는")
                        .foregroundColor(Color.gray)
                        .font(.system(size: 12, weight: .regular))
                    Color.gray
                        .frame(height: 0.5, alignment: .center)
                }

                Button("이메일로 가입하기") {}
                .buttonStyle(.signButton(type: .email))
            }

            Spacer()
        }
        .padding(20)
    }
}
정말 말도안되게 코드가 짧아졌다…
게다가 한번 서브클래싱을 해놨기 때문에 다른 뷰에서 버튼을 활용할때 정말 편하게 커스텀해서 쓸수가 있게되었다
중간에있는 HStack이 거슬린다면
 private var divider: some View {
        HStack {
            Color.gray
                .frame(height: 0.5, alignment: .center)
            Text("또는")
                .foregroundColor(Color.gray)
                .font(.system(size: 12, weight: .regular))
            Color.gray
                .frame(height: 0.5, alignment: .center)
        }
    }
이렇게 변수로 만들어서
var body: some View {
        VStack {
            Spacer()

            VStack(alignment: .center, spacing: 15) {

                Button("카카오로 시작하기") {}
                .buttonStyle(.signButton(type: .kakao))

                Button("네이버로 시작하기") {}
                .buttonStyle(.signButton(type: .naver))

                Button("Google로 시작하기") {}
                .buttonStyle(.signButton(type: .google))

                Button("Apple로 시작하기") {}
                .buttonStyle(.signButton(type: .apple))

                divider

                Button("이메일로 가입하기") {}
                .buttonStyle(.signButton(type: .email))
            }

            Spacer()
        }
        .padding(20)
    }
이렇게 넣어주면 더깔끔해진다… ㄷㄷ (SwiftUI최고!)
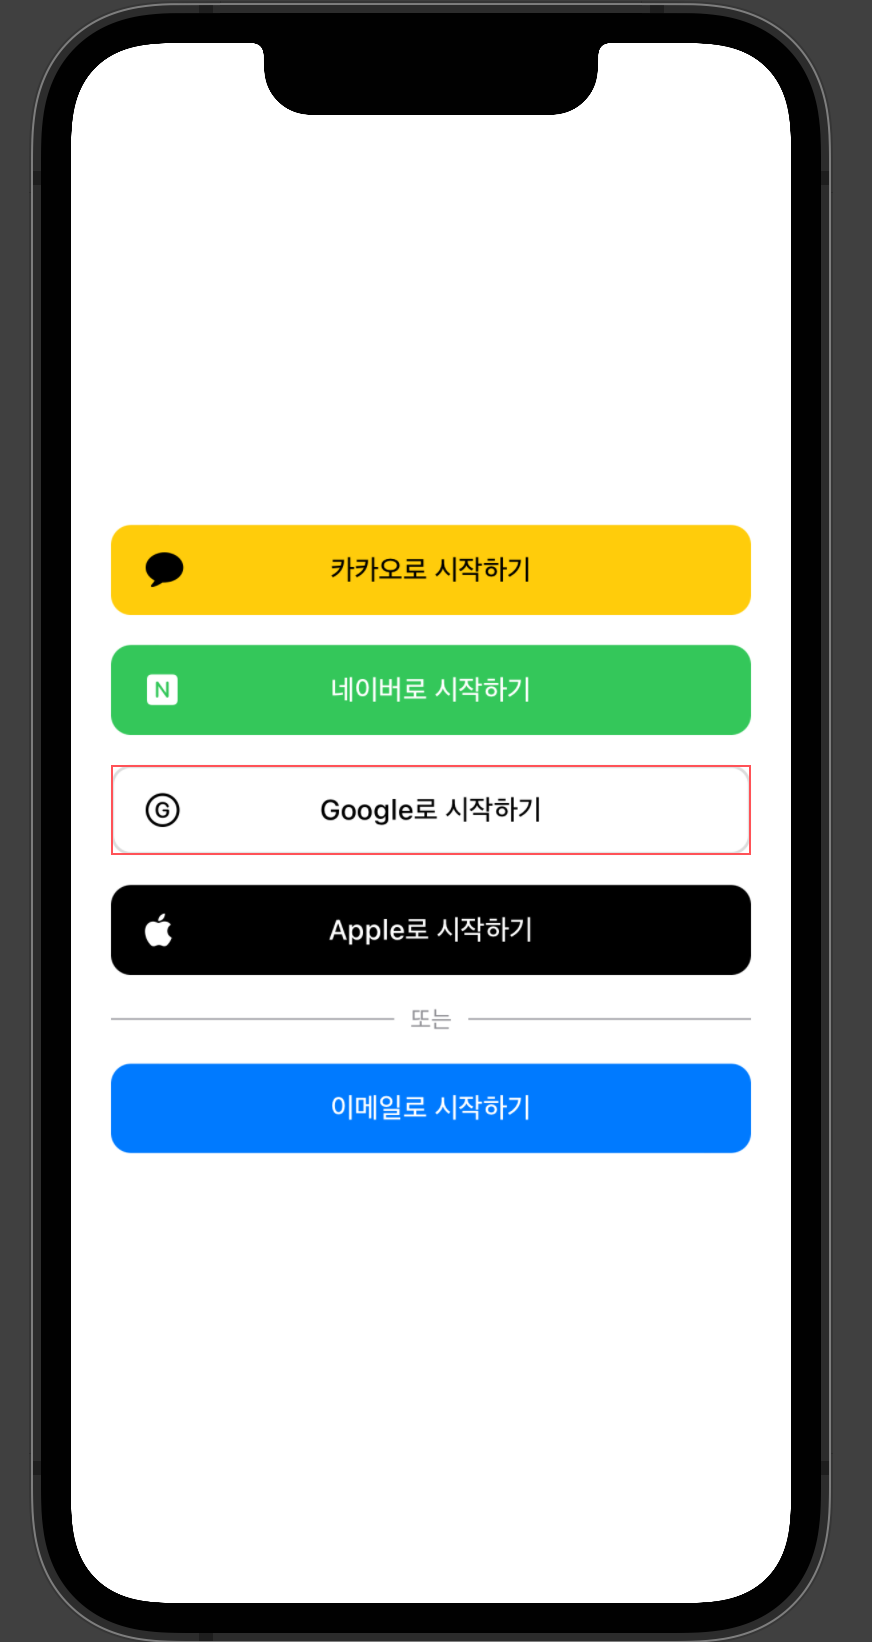
완성된 코드를 resume해주면 아래와같이 나온다